Table of Contents:
Overview:
In the previous article, We have talked about What is Lora & LoraWAN, the History of Lora, who invented it??? and How it works?? Later in another article, we have developed point-to-point communication-based LoRa Transceivers with RFM95 LoRa module and ESP32 Development kit.
In continuation to that, today we are going to work on LoRaWAN. In this video, we are going to work on star topology-based LoRaWAN communication.
In LoraWAN communication There will be LoRa nodes, LoRa gateways, Network Servers, and Application Servers. as a part of this tutorial, we will first set up a gateway and register the same on The Things Network Server. Later we Develop a LoRa End Node with RFM95 module and Arduino to publish Hello Electronics Innovation World! message. Since we are not using any real-time sensors to monitor the real-time data, I am not going to set up any application server as of now. Maybe in future videos, we will cover this part if we are developing any real-time project.
Let’s take a moment and thank PCBWay.com, The sponsor of the video.
PCBWay.com is an Online PCB manufacturing Enterprise, which produces the best in quality PCBs for just 5 dollars.
PCBWay.com offers all services you need to make Hardware for your IoT or Embedded Devices.
If you have a similar requirement, do check out their website for more details using this link.
Video Tutorial: setup LPS8 LoRaWAN gateway on TTN
This tutorial is also available in video format, you can watch the below videos or continue reading this article.
LPS8 Indoor LoRaWAN Gateway – Dragino
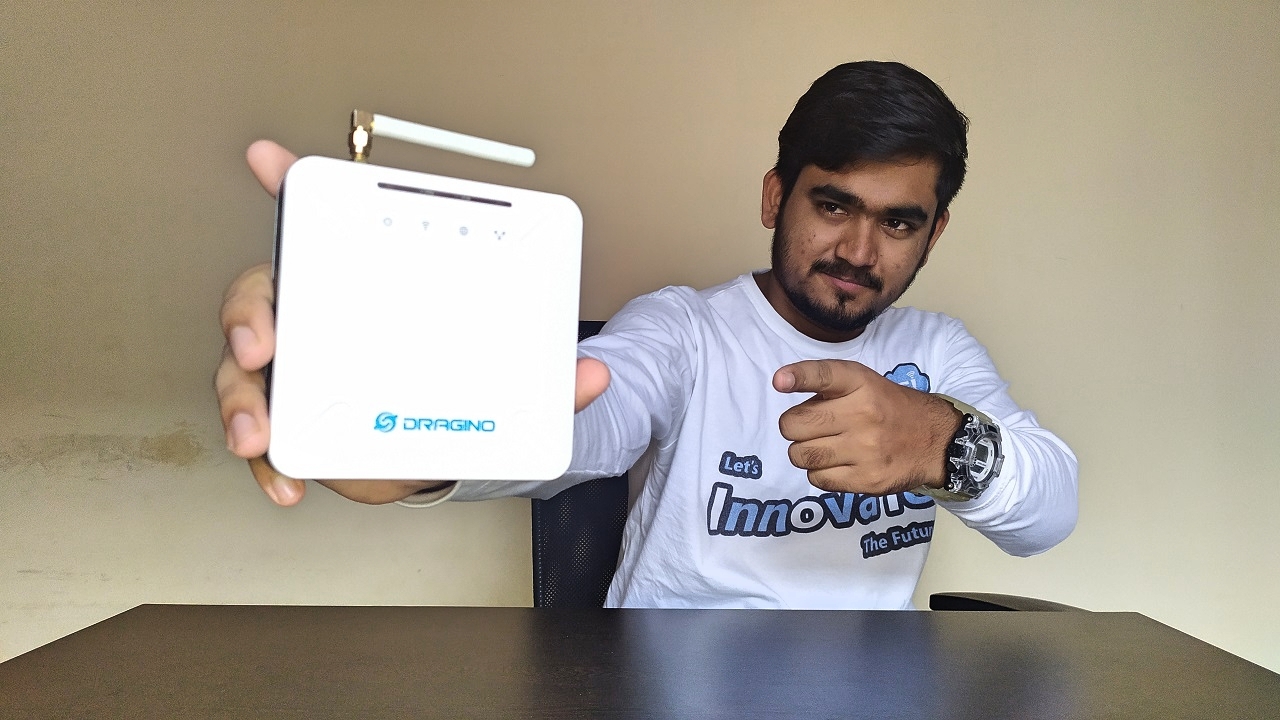
Recently, I bought this gateway from Dragino for my LoRa Development work. I have been using this gateway for the last 3 months. It’s a plug-and-play gateway with very simple configurations, I am happily using this amazing product from Dragino and haven’t encountered significant issues.
In this video, I will let you know how to set up & configure this gateway to communicate with LoRa End nodes in India allowed LoRa Frequency 865-867Mhz and transfer the received data to the things network server.
It’s one of my favorite LoRaWAN Gateways from Dragino which is named LPS8, LPS8 represents LoRaWAN Pico Station of 8 Channels.
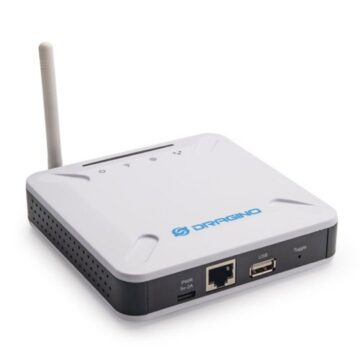
The LPS8 is an open-source 8-channel LoRaWAN Gateway. It lets you bridge LoRa wireless network to an IP network via WiFi, Ethernet.
The LPS8 uses a Semtech packet forwarder and is fully compatible with the LoRaWAN protocol.
It includes an SX1308 LoRa concentrator, which provides 10 programmable parallel demodulation paths. It can handle up to 1000 LoRaWAN end nodes from different suppliers.
LPS8 has pre-configured standard LoRaWAN frequency bands to use for different countries. You can also customize the frequency bands to use in your own LoRa network.
On the physical Appearance, It has an antenna to receive the LoRa Packets in 8-channels,
On top of the module, we got 4 status LEDs,
1. Power LED: This RED LED will be solid ON if the device is properly powered.
2. LoRa LED: This RGB LED will blink GREEN when the LoRaWAN module starts or transmit a packet.
3. SYS LED: This RGB LED will show different colors in a different state:
✓ SOLID BLUE: The device is alive with the LoRaWAN server connection.
✓ BLINKING BLUE: a) Device has internet connection but no LoRaWAN Connection. or b) Device is in booting stage
✓ SOLID RED: The device doesn’t have an Internet connection.
4, ETH LED: This LED shows the ETH interface connection status.
On the front side, it has a USB Type C port for Input Power with specs DC 5V, 2A. an Ethernet port, USB Host Port, and a Toggle button to reset to factory default settings.
On the sides of the gateway, it doesn’t have anything. At bottom of the gateway, it has the LoRa Pico Station information Like Model-LPS8, Frequency Band 865/868 serial no, and the WiFi mac address.
That’s all about the LPS8 gateway physical observations. let us power up the gateway and setup.
Configure LPS8 Indoor LoRaWAN Gateway:
There are three different ways to Access and Configure LPS8.
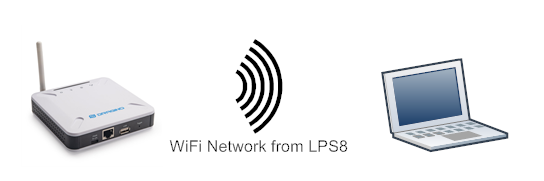
1. Connect via WiFi
The LPS8 is configured as a WiFi Access Point by factory default. You can access and configure the LPS8 after connecting to its WiFi network
2. Connect via Ethernet with DHCP IP from the router
Connect the LPS8 Ethernet port to your router and LPS8 can obtain an IP address from your router, You can access and configure the LPS8 by finding that IP address in the router management portal.

3. Connect via Ethernet by directly interfacing with laptop
Connect the LPS8 Ethernet port to your pc, it has a fall-back IP address on its WAN port, You can access and configure the LPS8 by using the fall-back IP address.

I will choose the first one, as it is the simplest way to access and configure the LPS8 over WiFi.
At the first boot of LPS8, it will auto-generate a WiFi access point called dragino-xxxxxx with password: “dragino+dragino”, Connect to that Access point by entering the password.
Now, open your favorite browser and enter the following IP address 10.130.1.1.
You will see the login interface of LPS8 as shown here.
The account details for Web Login are:
User Name: root
Password: dragino

After successful login, the LPS8 home page will appear on the screen, here you can see the network connection status of different environments like Whether the LPS8 is connected to the internet or not??? If connected whether it is wifi or ethernet, the status of LoRaWAN connection, LoRa connection, and the Access point connection.
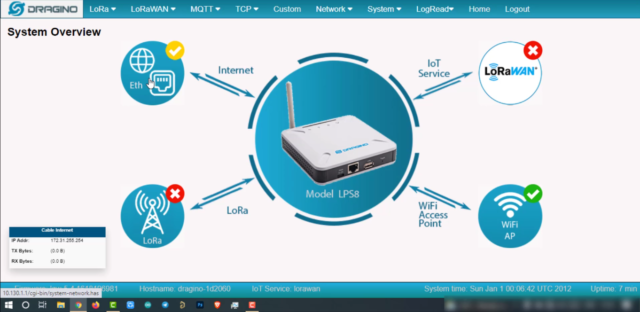
Now the LPS8 doesn’t have an internet connection, so, let us configure the LPS8 as a WiFi client by providing the Wifi credentials.
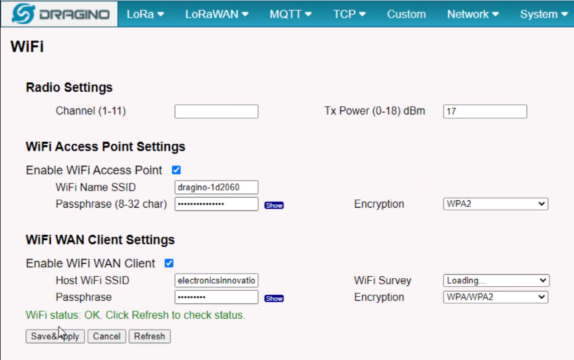
Go to the network, then click on WiFi, We have to configure the WiFi WAN Client Settings. Click on the WiFi survey and find your Wifi and select it. Then enter the password. Then check the “Enable WiFi client” option and click on save and apply. if you get the following response, as shown in the below picture… you made it buddy. Now uncheck the above Enable WiFi access point option and click on the save and apply button.
Now, The Access point will be removed and the LPS8 will directly connect to the Configured WiFi Network If you provide the right credentials.

If you provide the right credentials and the LPS8 connected to that network we can communicate over WiFi, lets see how we can do it??
First connect to the same WiFi network, Login to the router management page, and Search for Device Dragino-XXXXXXX, As you can see here our Gateway successfully connected to the router and allocated with the following IP address, Copy this address and past on the new tab, then add port 8000 and hit enter.

The same page appeared here. but the IP address is different. Now you can see the Access point is disabled and the rest of the networks connected.
Now, let’s configure the Lora frequency. go to LoRa and click on the Lora option. Select the right frequency plan… I am from India, So I choose the IN865-867 band which is allowed in my country. select the frequency allowed in your country. If you want you can also provide the GPS coordinates of the location where it is. Then click on save and apply.
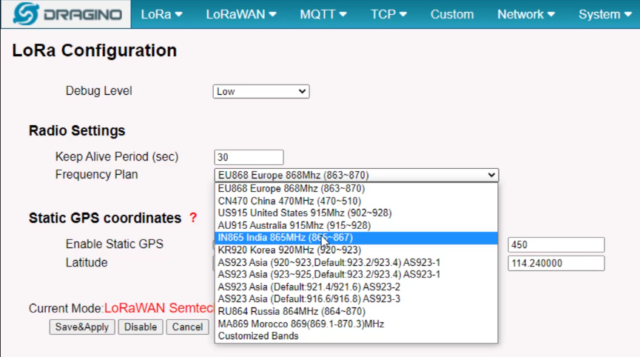
That’s it, now the Gateway is configured to receive the Lora data packets on 865-867MHz.
Now go to the LoRaWAN option and click LoRaWAN, Every LPS8 has a unique gateway id. copy the gateway id.
Open a new tab and visit The Things Network Platform, If you are a first-time user, Signup by providing all required details. Then log in to the platform using the same credentials. Then come to the Home.
Click on the username and select console.
The Things Network has divided all countries into 3 different clusters and assigned different server addresses. Select a cluster to start adding devices and gateways. As I am from India, I will choose Europe 1 or EU1, Now Login to the things stack using the things id, continue…
This is the Home page of the things stack community edition. Here we have two options create an application and register a gateway, choose to register a gateway.
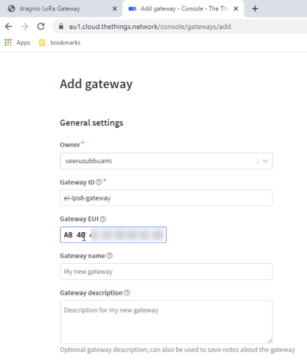
The following is the gateway registration page, the owner will be selected by Default, if you want you can change it. Enter gateway ID, this can be an alphanumeric string but only lower case alphabets are allowed, Then enter the Gateway EUI, This can be found on the Gateway LoRaWAN page, Copy that and paste here. If the gateway ID is in lower case alphabets, that will automatically convert to upper case letters, which is the desired format. Then Give a name for your gateway, this can be anything. Uppercase alphabets are allowed here. If you want you can also add a description for the gateway.
Then just remember the gateway server address, keep all these selections default, select the frequency plan. the frequency plan of the gateway should be entered. our plan is 865-867 so, the same plan was selected. Then click on create Gateway.
That’s it the gateway has been created successfully, and the status of the gateway showing disconnected for now. Because a couple of configurations are pending.
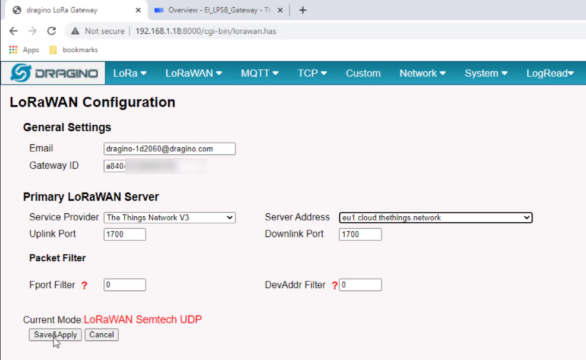
Now go to the gateway management page, Select service provider “The Things network V3” and then select the server address “eu1.cloud.thethings.network”, I have asked you to remember the server address right, the same address should be selected here. Then click on save and apply.
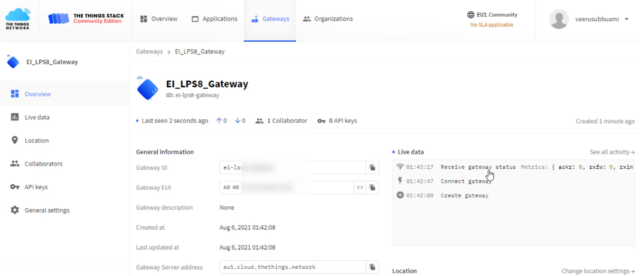
Then come to the things network page and reload it. as you can see here, the status of the gateway turned to Connected. The Live data log also showing the same. Gateway also sent the gateway status, all the gateway events details are here.
So, That’s it for this tutorial, We have successfully Configured the 8 channel LPS8 gateway to communicate with The things networks server, also registered and activated the LoRaWAN Pico station on the Things Network Server.
Now We have to Develop a LoRa End Node with RFM95 module and Arduino, but due to the long length of the article, I have decided to write another article for that. you can find that article here.
Stay tuned to electronicsinnovation.com for more interesting articles, See you soon… Bubyeee…
[…] the previous video, we have set up this LPS8 gateway and register the same on The Things Network. We have also seen that the gateway successfully connected to the network server and transmitted […]
[…] the previous video, we have set up this LPS8 gateway and registered the same on The Things Network. We have also seen that the gateway successfully connected to the network server and transmitted […]
[…] the previous video, we set up this LPS8 gateway and registered the same on The Things Network. We have also seen that the gateway successfully connected to the network server and transmitted […]