Table of Contents:
Overview:
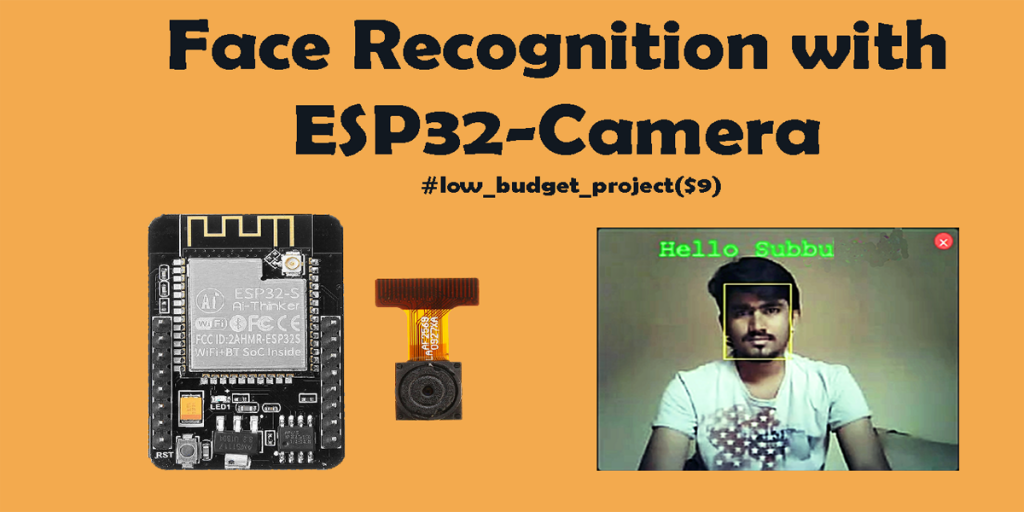
This article is all about face recognition with the ESP32-Cam board. I’ll show you how to set up a video streaming web server with ESP32- Cam and perform face detection and recognition of the particular person.
This tutorial is also available on the video format, you can watch the below video or continue reading this article.
Introduction to Face Detection and recognition.
In an increasingly digital world, protecting confidential information is becoming more difficult. passwords or pins are not enough to secure our information. To full-fill, this requirement Biometrics are coming into the picture. Biometrics is a unique Identity of the human-being. The biometrics like finger scan, Iris Scan, Hand scan face Recognition are unique. Tampering machines secured or protected with these biometrics is almost impossible.
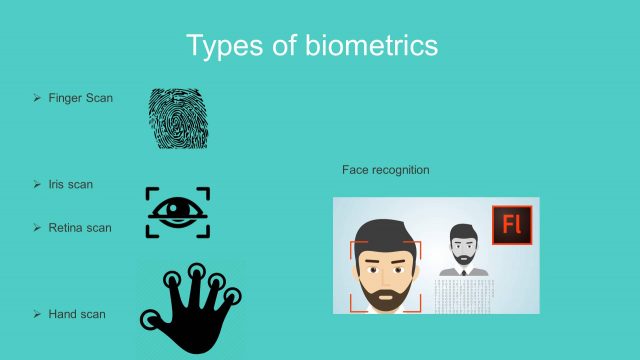
What is face recognition???
Identifying an individual by comparing live capture with the stored record for that person
Requirements for this Tutorial :
-
- ESP32-Cam with OV2640 Camera Buy From Amazon
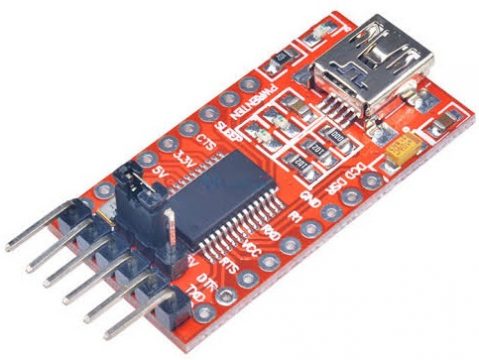
- FTDI programmer Buy From Amazon
- Data Cable Buy From Amazon
- Jumper wires Buy From Amazon
- Note: In this tutorial, we use the example from the Arduino-esp32 library. This tutorial doesn’t cover how to modify the example.
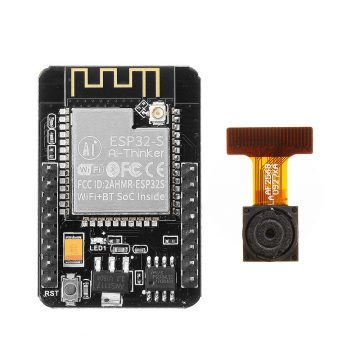
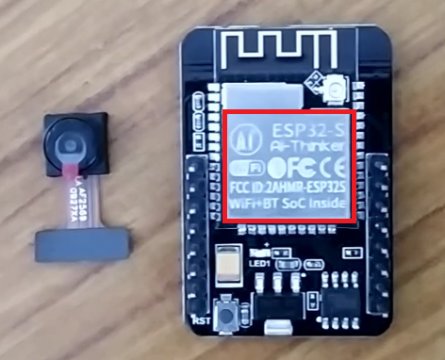
Introduction to ESP32-Cam:
The ESP32-Cam is a very small camera module with the ESP32-S chip that costs less than $10. Besides the OV2640 camera and several GPIOs to connect peripherals, it also features a microSD card slot that can be useful to store images taken with the camera or to store files to serve to clients.
ESP32-Cam Components/parts:
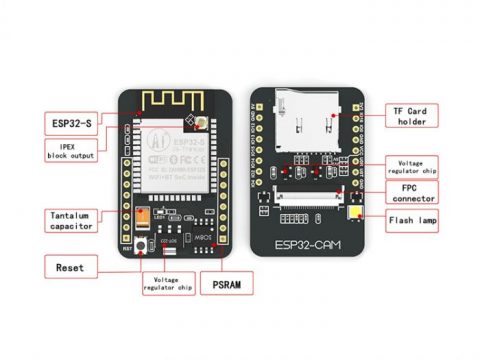
The ESP32-Cam doesn’t have any onboard USB connector like NodeMCU-ESP8266 comes with an onboard micro-USB connector, so you need an FTDI programmer to upload code through the U0R and U0T pins (serial pins).
Feature of ESP32 Camera:
Here is a list with the ESP32-Cam features:
- The smallest 802.11b/g/n Wi-Fi BT SoC module
- Low power 32-bit CPU, can also serve the application processor
- Up to 160MHz clock speed, summary computing power up to 600 DMIPS
- Built-in 520 KB SRAM, external 4MPSRAM
- Supports UART/SPI/I2C/PWM/ADC/DAC
- Support OV2640 and OV7670 cameras, built-in flash lamp
- Supports image WiFI upload
- Support TF card
- Supports multiple sleep modes
- Embedded Lwip and FreeRTOS
- Supports STA/AP/STA+AP operation mode
- Support Smart Config/AirKiss technology
- Support for serial port local and remote firmware upgrades (FOTA)
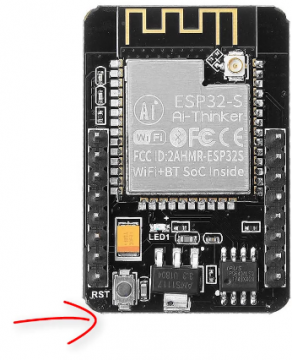
ESP32-Cam Pinout(AI-Thinker module):
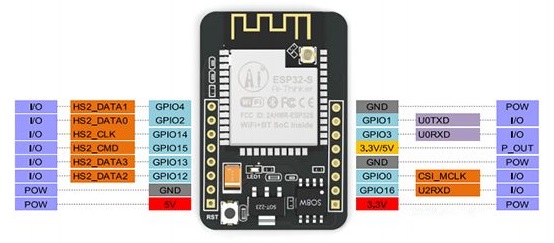
There are three GND pins and two pins for power: either 3.3V or 5V.
GPIO 1 and GPIO 3 are the serial pins. You need these pins to upload code to your board. Additionally, GPIO 0 also plays an important role, since it determines whether the ESP32 is in flashing mode or not. When GPIO 0 is connected to GND, the ESP32 is in flashing mode.
The following pins are internally connected to the microSD card reader:
-
GPIO 14: CLK
-
GPIO 15: CMD
-
GPIO 2: Data 0
-
GPIO 4: Data 1 (also connected to the on-board LED)
-
GPIO 12: Data 2
-
GPIO 13: Data 3
Configuration of Video Streaming Server:
Follow the below steps to build a video streaming web server with the ESP32-Cam that you can access on your local network.
1. Install the ESP32 add-on
In this example, we use the Arduino IDE to program the ESP32-Cam board. So, you need to have Arduino IDE installed as well as the ESP32 add-on. If you haven’t installed the ESP32 add-on in your machine, follow the below tutorials and get it installed.
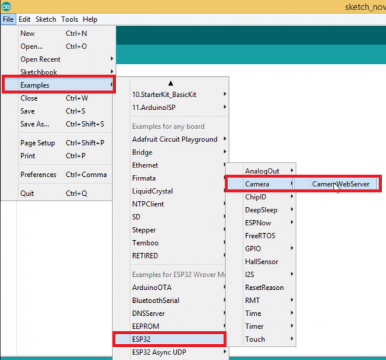
2. CameraWebServer Example Code
In your Arduino IDE, go to File > Examples > ESP32 > Camera and open the CameraWebServer example.
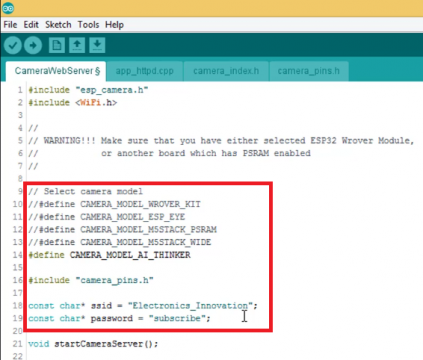
You need to make some modifications before uploading the code. Insert your network credentials in the following variables:
const char* ssid = "REPLACE_WITH_YOUR_WIFI_SSID";
const char* password = "REPLACE_WITH_YOUR_WIFI_PASSWORD";
Then, make sure you select the right camera module. In my case, it is AI-THINKER Model.
So, comment on all the other models and uncomment the appropriate one as shown below:
#define CAMERA_MODEL_AI_THINKERNow, the code is ready to be flashed into your ESP32-Cam module.
ESP32-CAM Code Uploading:
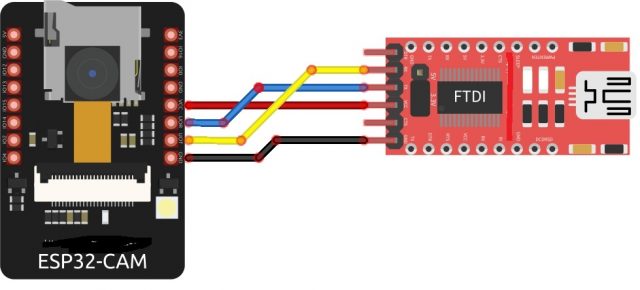
Connect the ESP32-CAM board to your computer using an FTDI programmer. Interface ESP32-cam and FTDI Programmes as shown below:
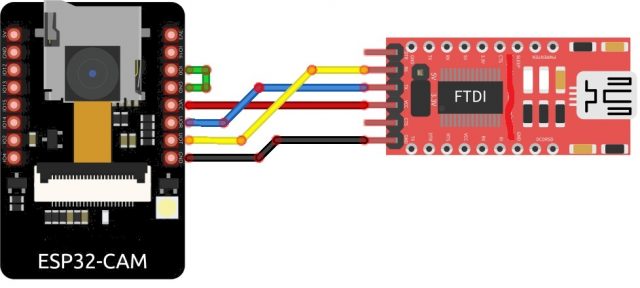 Note: GPIO 0 needs to be connected to GND so that you’re able to upload code.
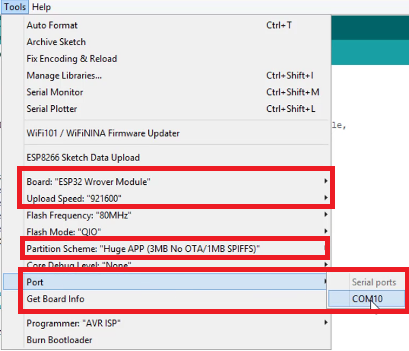
To upload the code, follow the next steps:
- Go to Tools > Board and select ESP32 Wrover Module
- Go to Tools > Port and select the COM port the ESP32 is connected to
- In Tools > Partition Scheme, select “Huge APP (3MB No OTA)“
- Press the ESP32-CAM on-board RESET button
- Then, tap on the upload button to upload the code
Note: if you can’t upload the code, double-check that GPIO 0 is connected to GND and that you selected the right settings in the Tools menu. You should also press the on-board Reset button to restart your ESP32 in flashing mode.
Uploading done: Hard resetting via RTS pin…
Don’t be panic, It’s not an error. It is letting us know that the ESP32-Cam is getting reset after the successful uploading of the code. This is the new feature of ArduinoIDE. This feature is available in version 1.8.0 or Above.

Getting Local IP Address of ESP32-Cam Server:
After uploading the code, disconnect GPIO 0 from GND.
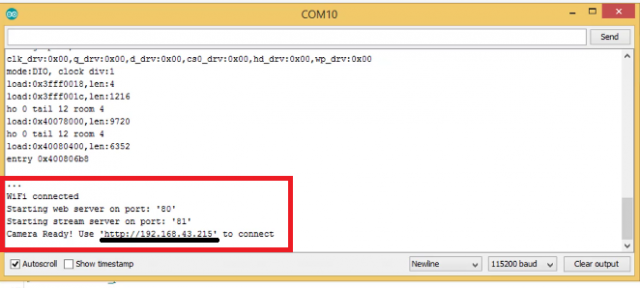
Open the Serial Monitor at a baud rate of 115200. Press the ESP32-CAM on-board Reset button.
The Status of the WiFi Connection, Camera module and ESP32 IP address of the webserver will print in the Serial Monitor as shown below.
Video Streaming Server
Now, you can access your camera streaming server on your local network. Open a browser and type the ESP32-CAM IP address. Press the Start Streaming button to start video streaming.
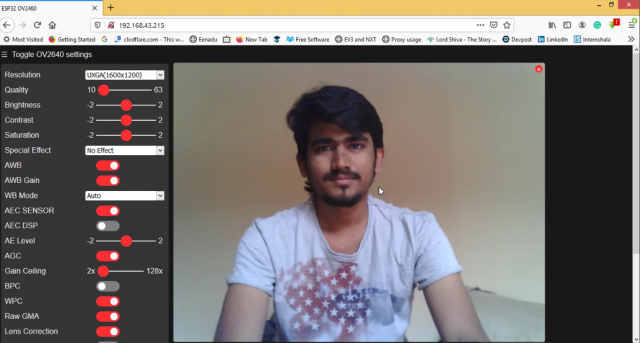
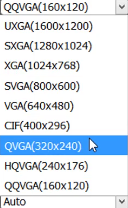
There are also several camera pixel configurations that you can play with to adjust the image settings. For better streaming experience it is recommended to choose “QVGA(320X240)”
Face detection and recognition:
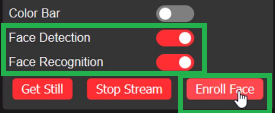
Enable the face detection and face recognition options that are present in the bottom left corner, then tap on the Enroll face button.
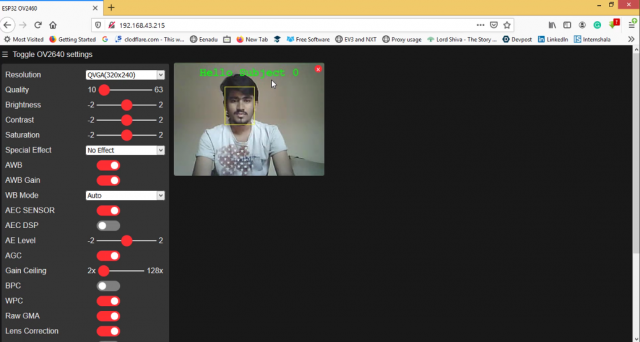
It will make several attempts to save the face. After enrolling a new user, it should detect the face later on (subject 0). And that’s it. Now you have your video streaming web server up and running with face detection and recognition with the example from the library.
After complete enrollment of the new face. It should start recognizing the face and will display Hello Subject 0, as shown below. You can change the subject 0 to the particular person named in the code.
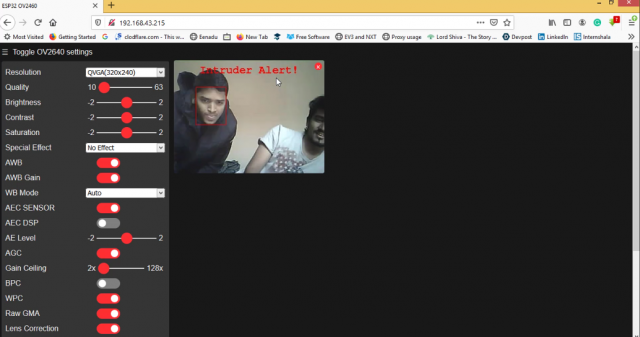
If any other persons who didn’t enroll, it will recognize them and dispaly Intruder alert.
So, this is how we have initiated an ESP32-Cam web server and Configured for face detection and Face recognition. It’s the cheapest module so far which can perform face recognition.
The ESP32-CAM provides an inexpensive way to build more advanced home automation projects that feature video, taking photos, and face recognition.
Hello!!
Thank you so much for the help with this video.
Question, is the code still available for this project?
Thank you.
hy i want to ask how to assign the name to registered face
Hi,
I am new to esp32cam.
Can you help me modify your code so that it can take a photo, put some customized text overlay, save it to the server with a customized filename?
I will teach this to out-of-school youths and my fellow Person with Disabilities (PWD) for their livelihood project.
Should I need make a small contribution for the effort, I will be happy to do it.
Thanks.
bro where is code
hey in my esp 32 cam enroll face option is not showing up kindly help me asap