Table of Contents:
Introduction:
MAX6675 Durability Testing | Maximum Temperature of MAX6675
Welcome to a series of articles on Sensors. In the previous article, we have interfaced with the MAX6675 sensor with Arduino and Displayed the Temperature data on both 16×2 LCD and OLED Display.
In this article, we will see what is maximum voltage this sensor can measure???
As per the datasheet, it can measure up to 1024 degrees Celcius which is equals to 1875.2 degrees Fahrenheit. After reading this no I was like how can you do that. So I have decided to see whether it can measure those huge temperatures or not.
So, Without wasting time lets get started.
PCBWay:
PCBWay is a famous brand for PCB Manufacturing. With more than a decade in the field of PCB prototype and fabrication, PCBWay is committed to meeting the needs of Techies from different industries in terms of quality, delivery, cost-effectiveness. As one of the most experienced PCB manufacturers, PCBWay provides the top class PCB manufacturing, PCB assembly, SMD Stencil services.
PCBWay is popular for its Flexible PCB Service. They are offering 1-8 layers of Flexible PCBs with 3-5 Working days build time. Currently, PCBWay is giving an extra 15% discount on Flex PCBs and Flex-rigid PCBs. So use this opportunity and get your Flex PCBs manufactured by the Top Class PCB Manufacture in the current industry.
At PCBway.com we can get 10 pieces of 2 layered PCBs at just $5 with 24 hours build time & also PCB way offering PCB assembly services at just $30 along with Free shipping. PCBway is also offering services like PCB prototype, SMD Stencil, PCB assembly, Flexible PCBs & Advanced PCBs. The best part of PCBway is the Instant quote feature, just enter the PCB size, choose the quantity, layers, and thickness. That’s it, we will get the instant quote. place an order by clicking on saving to cart. check out their website for more details.

Video Tutorial: MAX6675 Durability Testing
This tutorial is also available in the video format, you can watch the below videos or continue reading this article.
Required Components:
1. Breadboard, (Buy from Amazon)
2. Arduino Uno Board, (Buy from Amazon)
3. 16×2 LCD Screen, (Buy from Amazon)
4. OLED DIsplay, (Buy from Amazon)
5. MAX6675 Sensor (Buy from Amazon)
6. Screwdriver (Buy from Amazon)
7. connecting wires (Buy from Amazon)
Overview: MAX6675
Before jumping into the Hardware connection and programming, Let’s understand the facts and Capabilities of this sensor.
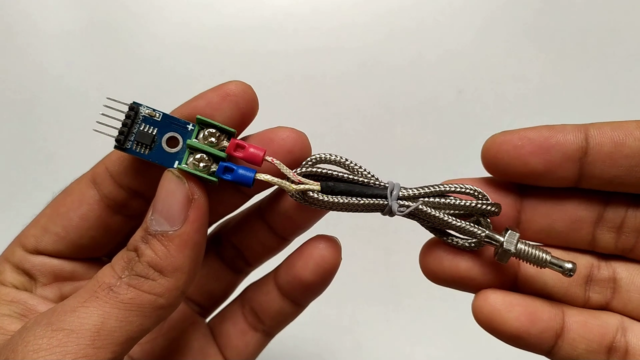
The MAX6675 performs cold-junction compensation and digitizes the signal from a K-type thermocouple. The output data in a 12-bit resolution, SPI compatible, read-only format. This converter resolves temperatures to 0.25°C, allows readings as high as +1024°C, and exhibits thermocouple accuracy of 8LSBs for temperatures ranging from 0°C to +700°C.
Direct digital conversion of Type -K thermocouple output
Cold-junction compensation
Simple SPI-compatible serial interface
Open thermocouple detection
Applications
Consumer Electronics, Industrial, Automotive
Absolute Maximum Ratings
Supply Voltage (VCC to GND) …………………………. -0.3V to +6V
Operating Temperature Range …………………….. -20°C to +85°C
Storage Temperature Range ……………………… -65°C to +150°C
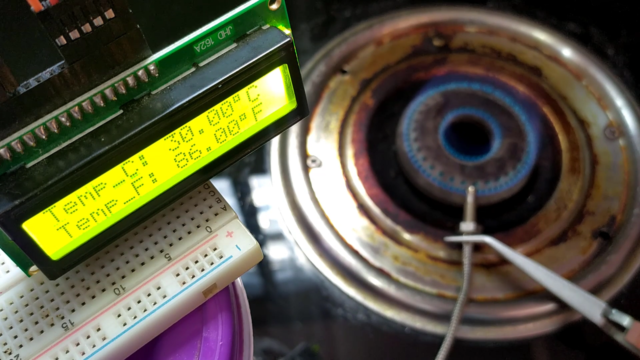
I’m gonna use this setup, which we have connected earlier, Arduino Uno will read data from the sensor, and print the same on LCD Screen.
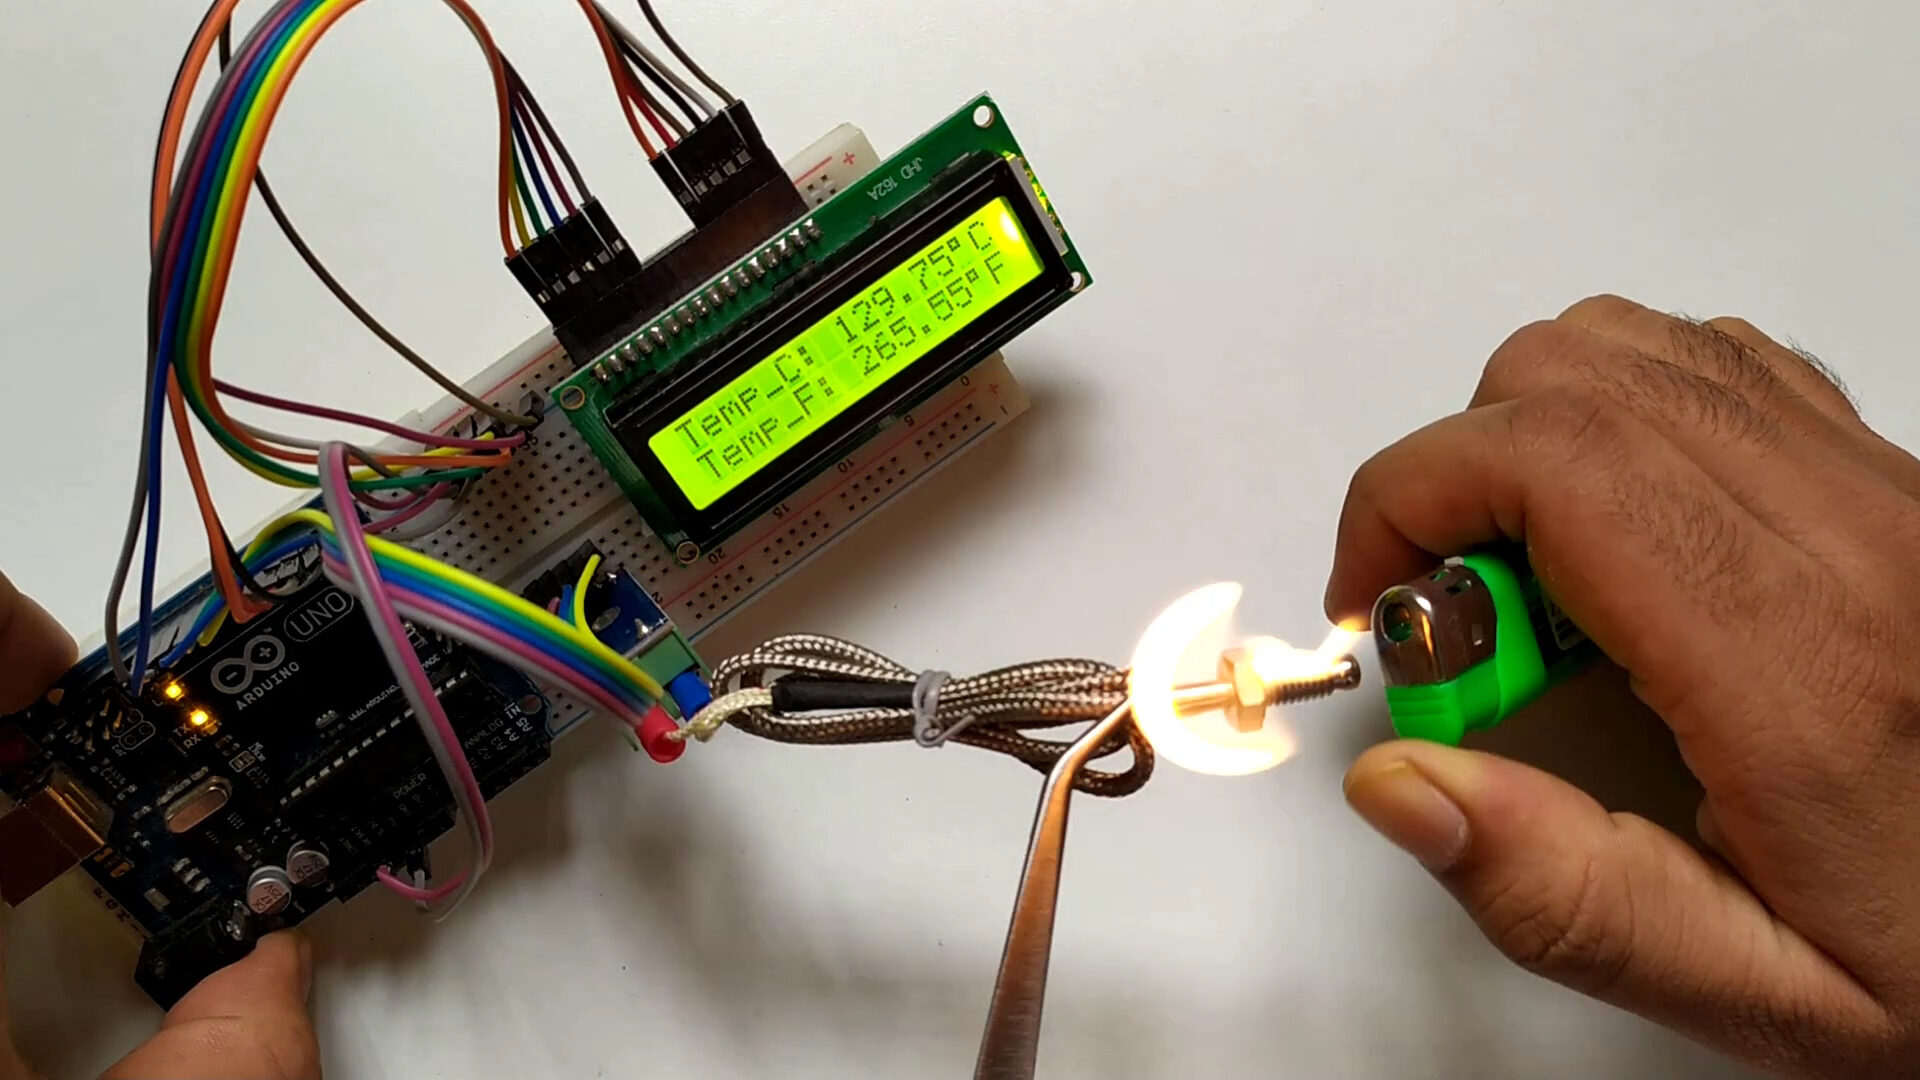
Now we are in my kitchen, the only way I found to generate 1024 degrees is gas stove only. I don’t think so, we can generate 1024 degrees celsius with Small gas lighter.
also holding a gas lighter till it reaches higher temperatures is very difficult, So, I think the gas stove is the better option for this testing.
I have arranged this setup like this, here we can see the temperature on the LCD screen in both Celcius and Fahrenheit formats.
Key points of Testing: MAX6675 Durability Testing
- The temperature increased to 500 degrees celsius, within one minute of time.
- It took one more minute to increase another 250 degrees Celcius
- Finally, it reached 750 degrees after 2 mins. The sensor knob color started changing to red color, also the temperature increasing slowly when compared to the previous period.
- It took one more minute to increase another 150 degrees Celcius, finally, it reached 900 degrees after 3 mins and the sensor working very fine.
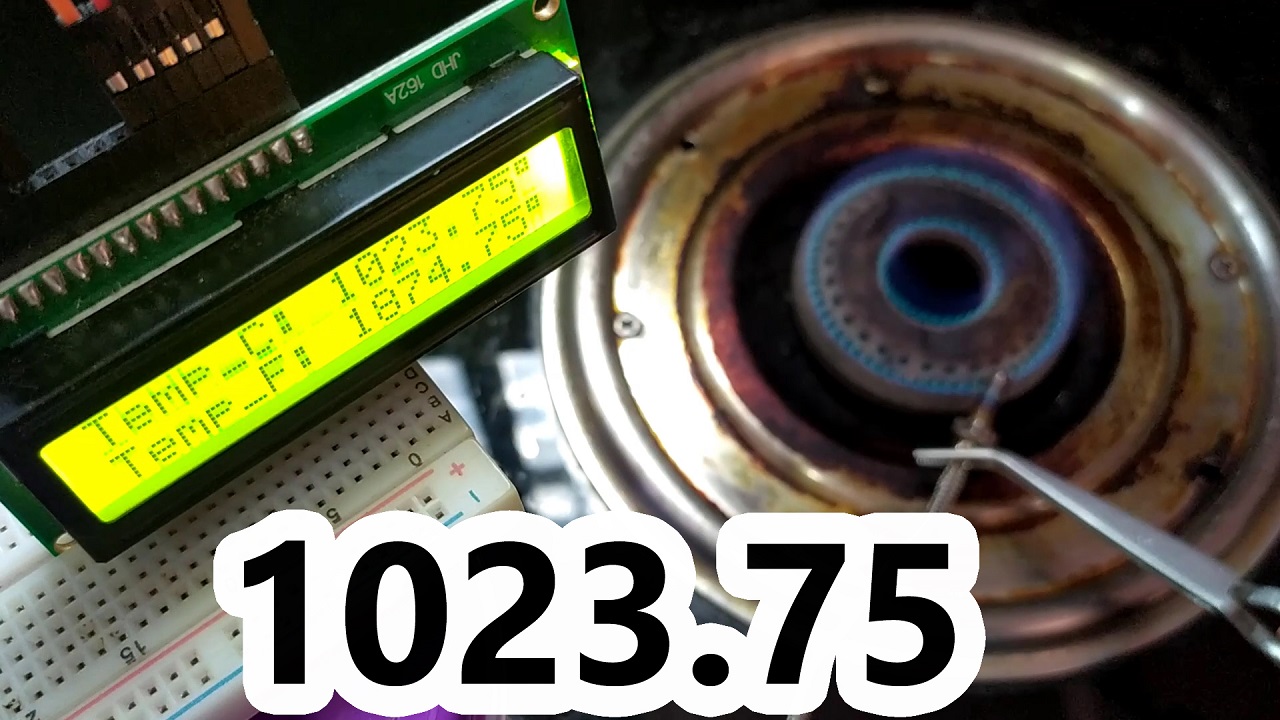
- Finally, it reached to 1023.75 degrees Celcius, which is equivalent to 1024 degrees Celcius after 4 mins 30 seconds. Yeah Now, we can say, we can measure 1024 degrees Celcius with this k-type thermocouple sensor. And the sensor knob turned to complete red color.
Summary of the Testing: MAX6675 Durability Testing
So, coming to the summary of the testing The maximum temeperature we have reached is 1023.75 degrees Celcius, and the sensor is working after reaching the maximum temperature seamlessly.
and the response of the sensor with temperature change is very good. If your project needs a high-temperature measurement, This sensor is recommended to use. Because this will never let you down.
So, That’s it for this tutorial, This is how I have generated 1024 degrees celsius and tested the K-type thermocouple sensors maximum measurable temperature.
If you want me to test any other sensor, please let me know in the comment section. We will try to do it. In the next video we will interface with ESP32 and display the sensors data on webserer.
See you soon on the next Article. bye bye…
[…] and Displayed the Temperature data on both 16×2 LCD and OLED Display. Then we have performed Durability or Capability testing and determined the maximum temperature which is 1023.75 degrees Celcius. We have also interfaced […]
[…] and Displayed the Temperature data on both 16×2 LCD and OLED Display. Then we have performed Durability or Capability testing and determined the maximum temperature which is 1023.75 degrees […]