Table of Contents:
Introduction:
Interfacing MAX6675 with Arduino and OLED Display | High-Temperature Thermometer for Industries
Welcome to a series of Articles on Sensors. In the previous article, we have interfaced the MAX6675 sensor with Arduino and Displayed the Temperature data on 16×2 LCD,
In this article, we will print the same data on OLED Display to avoid the messy connections. In the next article, we will perform Durability or Capability testing. we will also interface this sensor with ESP32 and ESP8266 and display the sensor data on the webserver.
So without wasting time lets get started.
PCBWay:
PCBWay is a famous brand for PCB Manufacturing. With more than a decade in the field of PCB prototype and fabrication, PCBWay is committed to meeting the needs of Techies from different industries in terms of quality, delivery, cost-effectiveness. As one of the most experienced PCB manufacturers, PCBWay provides the top class PCB manufacturing, PCB assembly, SMD Stencil services.
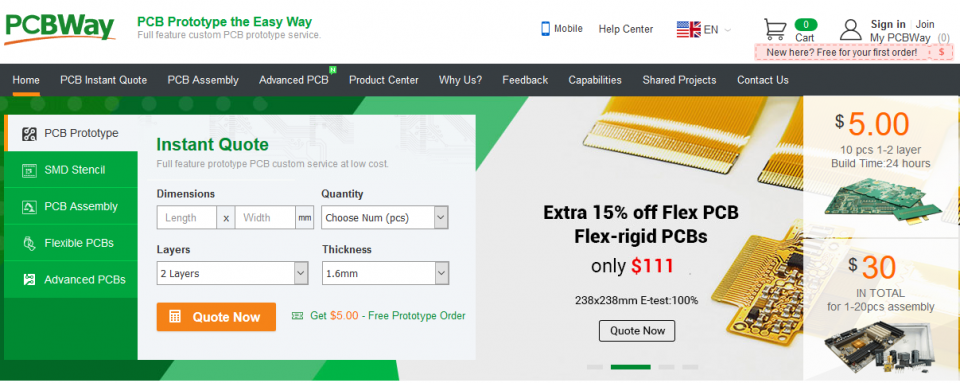
PCBWay is popular for its Flexible PCB Service. They are offering 1-8 layers of Flexible PCBs with 3-5 Working days build time. Currently, PCBWay is giving an extra 15% discount on Flex PCBs and Flex-rigid PCBs. So use this opportunity and get your Flex PCBs manufactured by the Top Class PCB Manufacture in the current industry.
At PCBway.com we can get 10 pieces of 2 layered PCBs at just $5 with 24 hours build time & also PCB way offering PCB assembly services at just $30 along with Free shipping. PCBway is also offering services like PCB prototype, SMD Stencil, PCB assembly, Flexible PCBs & Advanced PCBs. The best part of PCBway is the Instant quote feature, just enter the PCB size, choose the quantity, layers, and thickness. That’s it, we will get the instant quote. place an order by clicking on saving to cart. check out their website for more details.
Video Tutorial: Interfacing MAX6675 with Arduino and LCD
This tutorial is also available in the video format, you can watch the below videos or continue reading this article.
Required Components:
1. Breadboard, (Buy from Amazon)
2. Arduino Uno Board, (Buy from Amazon)
3. 16×2 LCD Screen, (Buy from Amazon)
4. OLED DIsplay, (Buy from Amazon)
5. MAX6675 Sensor (Buy from Amazon)
6. Screwdriver (Buy from Amazon)
7. connecting wires (Buy from Amazon)
Overview: MAX6675
Before jumping into the Hardware connection and programming, Let’s understand the facts and Capabilities of this sensor.
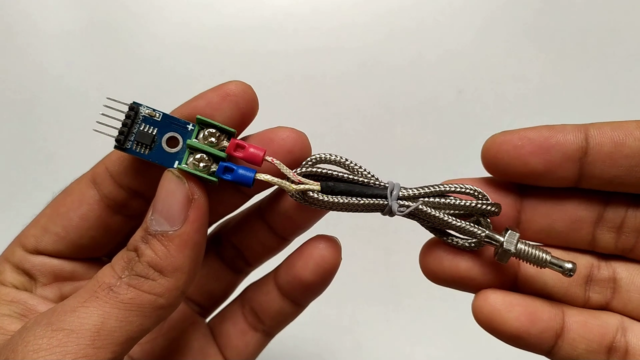
The MAX6675 performs cold-junction compensation and digitizes the signal from a K-type thermocouple. The output data in a 12-bit resolution, SPI compatible, read-only format. This converter resolves temperatures to 0.25°C, allows readings as high as +1024°C, and exhibits thermocouple accuracy of 8LSBs for temperatures ranging from 0°C to +700°C.
Direct digital conversion of Type -K thermocouple output
Cold-junction compensation
Simple SPI-compatible serial interface
Open thermocouple detection
Applications
Consumer Electronics, Industrial, Automotive
Absolute Maximum Ratings
Supply Voltage (VCC to GND) …………………………. -0.3V to +6V
Operating Temperature Range …………………….. -20°C to +85°C
Storage Temperature Range ……………………… -65°C to +150°C
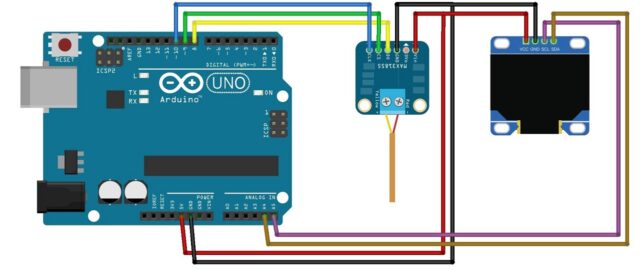
Circuit Diagram: Interfacing MAX6675 with Arduino and OLED Display
Here is the circuit diagram to interface MAX6675 and OLED Display with Arduino Uno Board. Arduino Uno will read data from the sensor, and print the same on OLED Screen.
Source code: Interfacing MAX6675 with Arduino and OLED Display
Coming to the programming part, here is the code to interface max6675 with Arduino and print sensor data on the OLED screen.
#include <Wire.h>
#include "max6675.h" //https://github.com/adafruit/MAX6675-library
#include <Adafruit_GFX.h>
#include <Adafruit_SSD1306.h>

#define OLED_RESET 4
Adafruit_SSD1306 display(128, 64, &Wire, OLED_RESET);

int thermoDO = 19; // SO of  MAX6675 module to D8
int thermoCS = 8; // CS of MAX6675 module to D9
int thermoCLK = 18; // SCK of MAX6675 module to D6

MAX6675 thermocouple(thermoCLK, thermoCS, thermoDO);

void setup()
{
  Serial.begin(9600);
  Serial.println("MAX6675 SERIAL TEST");
  // time for stabilization
  delay(1000);
  // initialize with the I2C addr 0x3C
  display.begin(SSD1306_SWITCHCAPVCC, 0x3C);
  // Clear the buffer.
  display.clearDisplay();
}


void loop()
{
  float t = thermocouple.readCelsius();
  float tF = thermocouple.readFahrenheit();
  // current temperature readout
  Serial.print("Deg C = ");
  Serial.println(t);
  Serial.print("\t Deg F = ");
  Serial.println(tF);
  Serial.println();

  // Clear the buffer.
  display.clearDisplay();
  //Celsius
  display.setTextColor(WHITE);
  display.setTextSize(1);
  display.setCursor(0, 7);
  display.print("Temperature: ");
  display.setTextSize(2);
  display.setCursor(0, 18);
  display.print(t);
  display.setTextSize(1);
  display.cp437(true);
  display.write(167);
  display.setTextSize(2);
  display.print("C");
  //Celsius
  display.setTextSize(2);
  display.setCursor(0, 45);
  display.print(tF);
  display.setTextSize(1);
  display.cp437(true);
  display.write(167);
  display.setTextSize(2);
  display.print("F");
  display.display();
  delay(1000);
}
Code Detailed Explanation:
These are the libraries we are using, out of these 4 libraries, wire.h is preinstalled, you don’t have to install it again. The rest of the libraries can be installed directly from the Arduino Library manager itself. Go to the library manager, type MAX6675, If you followed the previous video, you will get it as already installed. If you haven’t installed it, you can install it now. repeat the same process for Adafruit GFX, Adafruit SSD1306.
#include <Wire.h>
#include "max6675.h" //https://github.com/adafruit/MAX6675-library
#include <Adafruit_GFX.h>
#include <Adafruit_SSD1306.h>
Creating a display object for SSD1306 and passing screen size and reset pins as parameters. Declaration of sensor pins, Data output as 8, Chipselect as 9, Clock as 10. Creating a max6675 object and passing pin no as parameters.
#define OLED_RESET 4
Adafruit_SSD1306 display(128, 64, &Wire, OLED_RESET);

int thermoDO = 19; // SO of  MAX6675 module to D8
int thermoCS = 8; // CS of MAX6675 module to D9
int thermoCLK = 18; // SCK of MAX6675 module to D6

MAX6675 thermocouple(thermoCLK, thermoCS, thermoDO);
coming to the void setup, initializing serial monitor at 9600 baudrate, Initializing Display with an object and passing I2c address, and clearing the OLED Display.
void setup()
{
  Serial.begin(9600);
  Serial.println("MAX6675 SERIAL TEST");
  // time for stabilization
  delay(1000);
  // initialize with the I2C addr 0x3C
  display.begin(SSD1306_SWITCHCAPVCC, 0x3C);
  // Clear the buffer.
  display.clearDisplay();
}
Coming to the void loop, reading sensor data, and storing into the variables.
The temperature in Celcius format and Fahrenheit is being stored in the variable t, and “tf” respectively, then printing same data on the serial monitor.
Clearing the display, before printing anything on it. Then printing temperature in Celcius format on OLED Display using these lines, Printing temperature in Fahrenheit format on the OLED screen
void loop()
{
  float t = thermocouple.readCelsius();
  float tF = thermocouple.readFahrenheit();
  // current temperature readout
  Serial.print("Deg C = ");
  Serial.println(t);
  Serial.print("\t Deg F = ");
  Serial.println(tF);
  Serial.println();

  // Clear the buffer.
  display.clearDisplay();
  //Celsius
  display.setTextColor(WHITE);
  display.setTextSize(1);
  display.setCursor(0, 7);
  display.print("Temperature: ");
  display.setTextSize(2);
  display.setCursor(0, 18);
  display.print(t);
  display.setTextSize(1);
  display.cp437(true);
  display.write(167);
  display.setTextSize(2);
  display.print("C");
  //Celsius
  display.setTextSize(2);
  display.setCursor(0, 45);
  display.print(tF);
  display.setTextSize(1);
  display.cp437(true);
  display.write(167);
  display.setTextSize(2);
  display.print("F");
  display.display();
  delay(1000);
}
Uploading code to Arduino UNO:
Connect Arduino Uno with a laptop, check uploading configurations Board Arduino UNO, and select the right port.
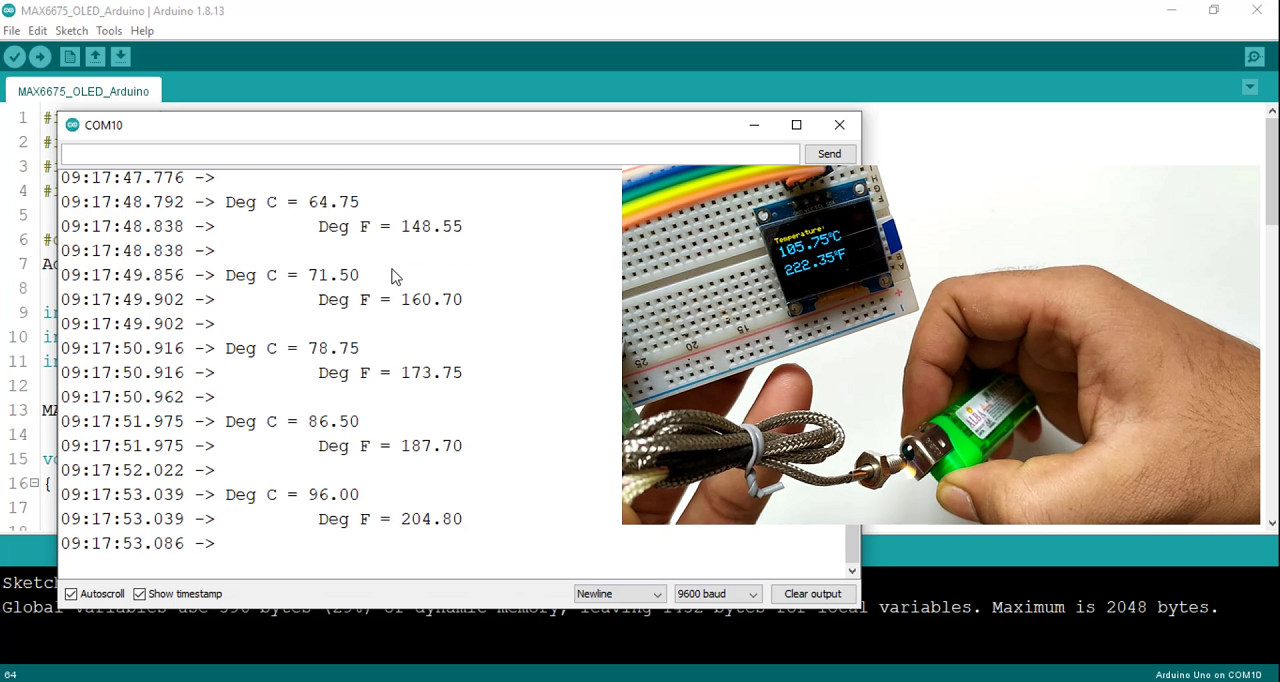
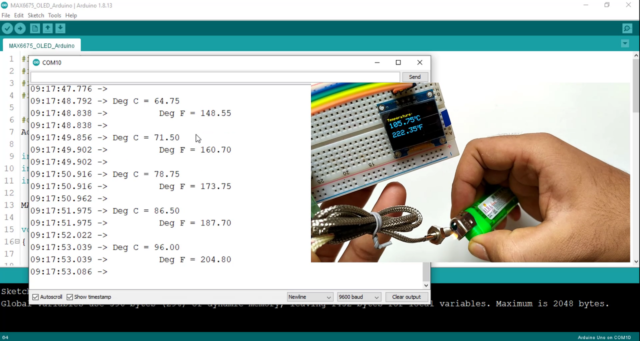
If everything is okay Upload the code. After successful uploading open serial monitor. If the sensor is working, you can see the temperature data on the Serial monitor.
You can also see the Temperature data in both Celcius and Fahrenheit format on the OLED screen. The temperature will be updated for every 500 milliseconds.
Video Tutorial: Interfacing MAX6675 with Arduino and LCD
This tutorial is also available in the video format, you can watch the below videos or continue reading this article.
[…] Welcome to a series of articles on Sensors. In the previous article, we have interfaced with the MAX6675 sensor with Arduino and Displayed the Temperature data on both 16×2 LCD and OLED Display. […]
[…] interfaced MAX6675 sensor with Arduino and Displayed the Temperature data on both 16×2 LCD and OLED Display. Then we have performed Durability or Capability testing and determined the maximum temperature […]
[…] interfaced MAX6675 sensor with Arduino and Displayed the Temperature data on both 16×2 LCD and OLED Display. Then we have performed Durability or Capability testing and determined the maximum temperature […]