Table of Contents:
Introduction
Hello, fellow innovators! Welcome back to Electronics Innovation! Today, I’m thrilled to guide you through our latest project: replicating the legendary Iron Man Arc Reactor. This project covers everything from design and assembly to programming and the final touches. Whether you’re a Marvel enthusiast or an electronics hobbyist, this challenge is the perfect mix of creativity and technical skill. Let’s dive in!
The Inspiration Behind the Project
As a long-time Marvel fan, the Arc Reactor has always fascinated me. Instead of creating a basic replica with simple LEDs, I wanted to build something that truly embodies the brilliance and complexity of Tony Stark’s technology.

Selecting the Right Components
To achieve this, I selected WS2812C/W addressable LEDs. These LEDs provide greater control and customization. They are also ideal for portable electronics due to their low operating current of 5mA and the ability to be powered directly by a power bank. Each LED comes with four pins (VDD, DIN, DOUT, VSS) and operates within a wide voltage range, making them perfect for our Arc Reactor.
Nextpcb.com
The PCBs I’m gonna use in this video are ordered from nextpcb.com
Nextpcb.com is a reliable multilayer PCB manufacturer that takes orders online and delivers PCBs to your doorstep globally.
Currently, NextPCB has some exciting offers. You can get your first PCB order free up to $20, and they are also offering free PCB assembly for 5 PCBs and 50% off on up to 100 PCB assemblies.
What are you waiting for? Take advantage of this offer for your next PCB order!

Designing the Circuit
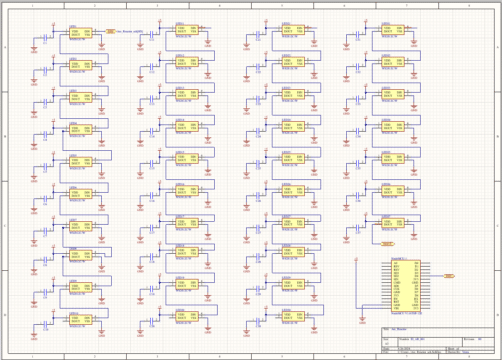
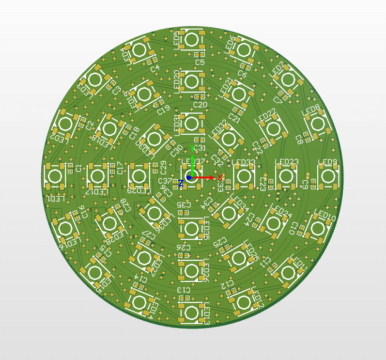
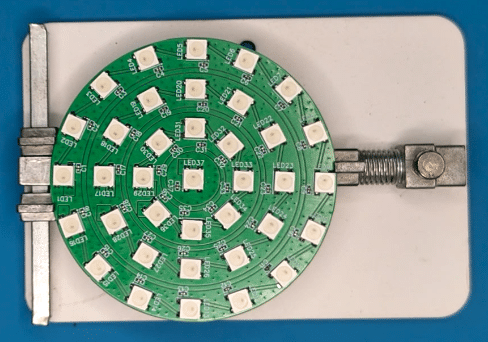
Next, I moved on to the circuit design in Altium Designer. The goal was to replicate the Arc Reactor’s iconic look. I carefully arranged 37 LEDs in rings to mimic the structure seen in Iron Man 2. The outer ring contains 16 LEDs, the next ring holds 12, the following has 8, and there is a single LED in the center. The entire PCB was designed with a diameter of 72mm, matching the movie’s exact dimensions.
PCB Layout and Routing
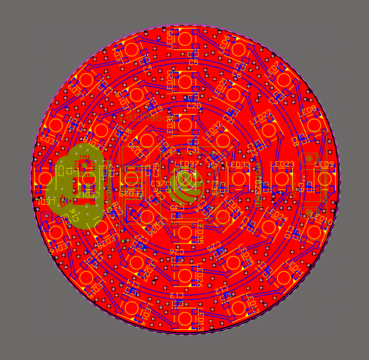
With the circuit design complete, I began the PCB layout and routing. The NodeMCU ESP8266 module was placed on the bottom layer, modified to avoid interfering with the LEDs. Ground planes were stitched with VIAs, optimizing the layout for reliable performance. This careful placement ensures that the lights shine brightly and uninterrupted.
Collaboration and Design Review
Before finalizing the design, I used Altium 365, a cloud-based platform that facilitates collaboration and design review. Sharing the project with another designer helped us catch a couple of issues, such as a silkscreen interference and a missing logo, which were quickly resolved. Altium 365 made it easy to collaborate in real-time, ensuring that the design was flawless before moving to production.
Preparing for Manufacturing
With the design finalized, it was time to generate the Gerber files for PCB fabrication. I chose NextPCB, a reliable manufacturer, to bring the design to life. They offer excellent deals like free PCBs for first orders and discounted assembly services, making them a great choice for hobbyists and professionals alike.
Unboxing and Quality Check
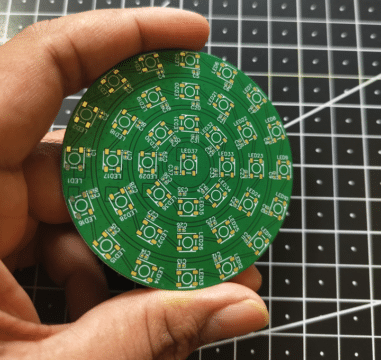
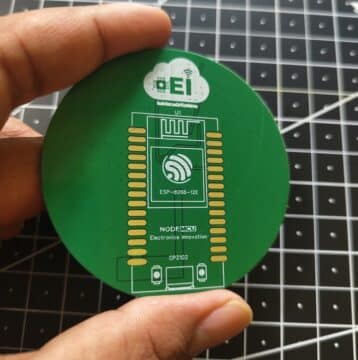
When the PCBs and components arrived from NextPCB, I was impressed by the quality. The silkscreens were precise, the solder mask was evenly applied, and the conductive pads were flawless. The secure packaging ensured everything arrived in perfect condition, ready for assembly.
Soldering and Assembly
The assembly process involved carefully soldering the 37 addressable LEDs, capacitors, and the ESP8266 module onto the PCB. Each component was placed precisely, ensuring that the final product would not only look great but also function perfectly. Soldering is meticulous but essential for ensuring the durability and performance of the Arc Reactor.
Programming the ESP8266
Once the assembly was complete, I moved on to programming the ESP8266 module. I used the ESPhome-Flasher and WLED firmware to bring the Arc Reactor to life. This involved downloading the necessary software, flashing the firmware, and configuring the LEDs to achieve the perfect light effects.
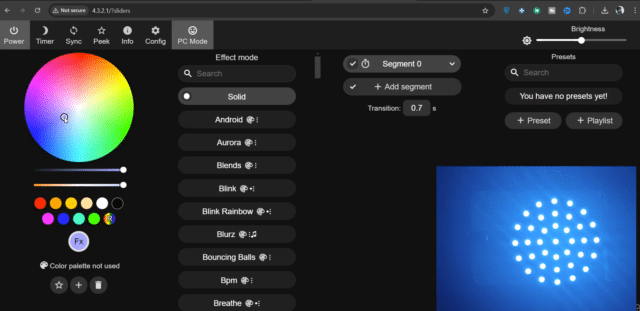
Initially, not all the LEDs were lighting up correctly. After troubleshooting, I found that the LED length settings needed adjustment to accommodate all 37 LEDs. Once corrected, the Arc Reactor lit up beautifully, exactly as envisioned.
Exploring WLED Features
WLED offers a range of customization options, allowing you to select specific colors, adjust brightness, and apply various effects. For the Arc Reactor, I chose a pale blue light to match the original design from the movies. WLED also includes different lighting effects, adding a dynamic element to the Arc Reactor’s glow. My favorite effect was the DJ Light, which added a pulsating rhythm to the light display.
The Final Touch: Diffuser and Casing Design
To complete the Arc Reactor, the final step involves designing a diffuser and casing. The diffuser evenly spreads the light, giving it that iconic glow seen in the movies. The casing protects the components and enhances the visual appeal, making the Arc Reactor look as authentic as possible.
Conclusion
Creating a DIY Iron Man Arc Reactor has been an incredibly rewarding project, blending creativity with technical skill. From designing the PCB and selecting the right components to assembly and programming, every step brought us closer to replicating Tony Stark’s iconic technology.
If you’re inspired by this project, why not try it yourself? The design files are open source, so feel free to modify, enhance, or replicate this project. And don’t forget to take advantage of NextPCB’s offers for your next PCB order!
Stay tuned for more exciting updates as we finalize the diffuser and casing design. Until then, keep innovating, and as always, happy building!
Call to Action
Are you ready to bring Tony Stark’s tech to life?
Download the open-source design files from my Altium365 Workspace, and start building your very own Arc Reactor today!
Download Link: DIY Arc Reactor Design Files
Share your progress and final build with us—we’d love to see how your Arc Reactor turns out.
This tutorial is also available in the video format, due to the lengh we have divided the video into 2 parts, you can watch the below videos or continue reading this article.
